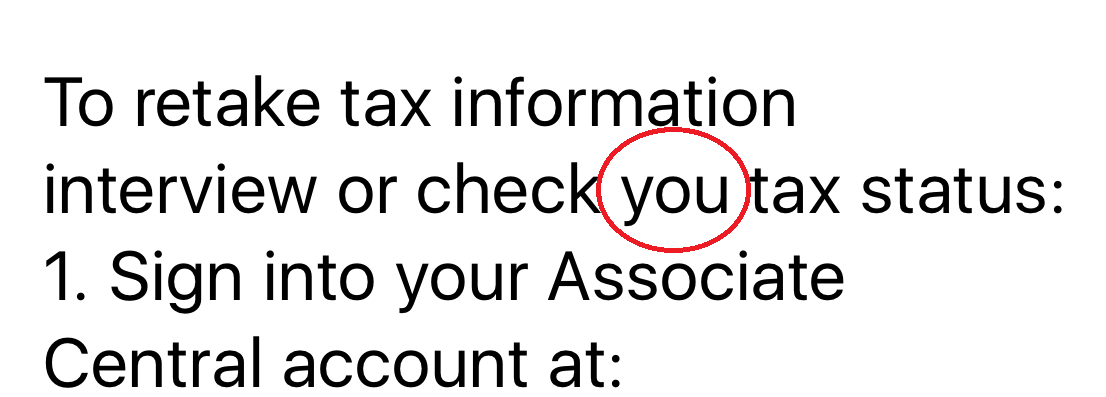
Grammar “Used To Be” More Important

This is a pretty common error that I saw on a TV ad recently. The phrase “use to be” is incorrect. When you’re talking about something that happened in the past but doesn’t happen anymore, the correct phrase is “used to be.” In this sentence it means that in the past, surgery was the only option, but it is not the only option anymore, so “used to be” would be correct.

Grammar Giggle – Dutchess

My local news had a little bit of trouble spelling “Duchess.” A Duchess is the female equivalent if a Duke. Dutchess could possibly be a woman from the Netherlands, but is not a word that appears in a dictionary. The Duchess of Cambridge is a well-known figure and the headline is obviously incorrect.

Dutchess

Are Job Titles Capitalized?

Bailiff or bailiff-A reader recently emailed asking about the word “bailiff” and whether it was capitalized when transcribing a legal court hearing.  She asked “I understand that when it is used as a title, for example: Bailiff Jones will now take the jury to the jury room. But, during the course of conversation by the Judge – for example: If you (jury) has a question, please write out the question and hand it to our bailiff.  Is the word bailiff capitalized then – or is it capitalized throughout the document just as you would for Mr. or Mrs.?”

Based on my review of the Gregg Reference Manual, it would be capitalized when used with the last name as  in Bailiff Jones, but I do not think in the Judge’s conversation it would be capitalized. However, in reading Paragraph 313(c), it could be capitalized just because it is a court transcription and the bailiff might be considered an “official of high rank” in that courtroom by the persons reading the transcript.

  • Paragraph 313(c) – Titles of local governmental officials and those of lesser federal and state officials are not usually capitalized when they follow or replace a personal name. However, these titles are sometimes capitalized in writing intended for a limited readership when the intended reader would consider the official to be of high rank (emphasis added).

Paragraph 312(e) says not to capitalize occupational titles preceding names. The way to distinguish occupational titles from official titles is that only official titles can be used with last names alone. for instance, you wouldn’t address a person as “Author Collins,” “Lawyer Jones,” or “Director of Public Marketing Smith,” so they are occupational titles and shouldn’t be capitalized. As a general rule, the Gregg Reference Manual says not to put a title before a person’s name unless it is short and you would actually use the title when you are addressing them aloud.

Other sources say if the title precedes the name, it should be capitalized and if it does not, it should not be. But what about “bailiff”? As above, you would address them as “Bailiff Jones” but in this case the title is not preceding the name–you are just using “bailiff.” According to Gregg Reference Manual:

  • Paragraph 313(e) – In general, do not capitalize job titles when they stand alone. However, in procedures manuals and in organization memos and announcements, job titles are sometimes capitalized for special emphasis.

My gut says not to capitalize it because it is a job title in that courtroom and you are not capitalizing other job titles like court reporter, judicial assistant, etc. when they are used in place of a name.

Do you agree or disagree? Comment below.

15 Proof That Proofreading Tips

I thought it would be helpful to post about my tips for the most effective and efficient proofreading possible. Here are my tips:

  1. Print it out and go to a quiet place if possible. I realize that isn’t always possible, but it is easier to proof a long or more complicated document if you print it out and concentrate on it. You can proofread on your computer screen, but you may miss things. If you doubt that, proofread something and then go back the next day and proofread it again. Perhaps not every time, but it’s much easier to miss things on the computer screen. Some things can only be checked on the computer, but I suggest you proofread the hard copy first.
  2. Check for spacing. One of the biggest things I find is difference in spacing. It is usually a cut-and-paste problem. One paragraph will be double spaced and the next will be exactly 24 pt. Those are different measurements and they will throw off the spacing between paragraphs and will look different.
  3. Font size. This is another one that happens a lot and again may be a cut-and-paste problem. If you’re working on a document to be filed with a court, check the court’s local rules for the required font size. Different courts in different counties have very different font requirements. For example, the Northern District of California requires 12 point font, while the Southern District of California requires 14 point font, the Central District of California requires 14 point font, and the District Court of Arizona requires 13 point font. Once you know the correct font size, check your document to make sure it is all the same (and the correct) font size. While you’re looking at the font size, make sure the font style meets court requirements and is consistent. Times New Roman is generally accepted by all courts.
  4. Footnotes. While you’re looking at the local court rules for document font size, make sure to check to see if footnotes are required to be the same size font. Most of them that I have seen do, but there are a few that do not, so you need to know what the rule is because that will definitely change the pagination (and potentially the length) of your document. If there are page limits, this could be an issue.
  5. Numbering. Check to make sure your numbering is consecutive. Sometimes the author will start with manual numbering, then go to auto numbering, and end up back with manual numbering, so you need to go through the whole document just to check for sequential numbering. I might be a good idea to start your proofreading session just by going page by page to check for numbering.
  6. Margins. Make sure your margins are consistent and that indented quoted language has indented margins on both sides every time.
  7. Justification. Justification is author preference or firm standard. If a document should be right justified, make sure every paragraph (including the indented paragraphs and footnotes) is justified.
  8. Centered headings. Check headings to make sure it is not indented like the paragraphs around it. An indent of the first line will not center the heading between the margins, it will center the heading between the indent and the right margin.
  9. Styles. If the document is using Word’s styles feature, make sure that each heading and paragraph uses the correct style. It is much easier to add a table of contents to a document with heading styles.
  10. Caption, signature, service list. These are things that the author will not look at, they just assume it is correct. It is always best if you set up a caption file to start documents so you can change it when necessary and it is always correct. Unfortunately, when attorneys start drafting documents, they usually just pull another document for that client without thinking that the service list might have changed by additions or deletions of parties or changes of address, that the attorney identification information could have changed with attorneys coming and going from firms and that the signature line information should match, or that the judge may have changed or the case may have consolidated with another case. Just look at the caption to make sure it is correct and matches your caption document.
  11. Date. Make sure the date is current. In pulling language from old documents, sometimes the author copies–but does not look at–the date and that is confusing for everyone.
  12. Salutation. If you are preparing or proofreading a letter, make sure the salutation is correct, has the appropriate person’s name, and is spelled correctly. Nothing bothers a recipient as much as having their name misspelled, so confirm the spelling.
  13. Widow and orphan lines. Widow and orphan lines are the single lines or parts of a line at the top and bottom of the page. It looks sloppy and is unnecessary. Word has a setting (Home, Paragraph, Line and Page Breaks, Widow/Orphan control) that will make it automatic if set up at the beginning. If it isn’t set up, you can mark individual paragraphs when you see widow or orphan lines while you are proofreading.
  14. Spell checker. Word’s spell checker is a valuable resource, but be very careful. You still need to actually read the document as some errors are still real words so will not show up on the spell checker. Some may show up in the grammar checker, but it is best to read it.
  15. Global search and replace. Global search and replace is another valuable tool, but can create a mess. You can use search and replace, but I suggest you actually look at each instance to make sure whether the replace should be done or not. Remember that if your search term is in quoted material, it must not be replaced. If you do a global search and replace, it will be automatic, making your quoted material wrong and potentially giving your opposing counsel free license to let the judge know in their next pleading that your quote was wrong and leaving the judge to decide if he or she should question other material in your future documents.

As I’ve said before, taking the time to proofread everything going out the door is worth it. It makes your firm look good, your attorney look good, and you look good. I typically redline my suggested edits to someone else’s document and send it back to them for review. Never ever just make edits as you could change the entire meaning of a document by changing one word or phrase to what you think they meant to say when that isn’t what they meant to say at all. Always let the author make the decision on whether the edits should be made.

I hope this was helpful to you. If you have other tips for successful proofreading, please comment below. We can all learn from each other.